

Nine out of ten solar light failures trace back to a single component: the rechargeable battery. If your solar lights won’t illuminate at dusk, start by replacing the battery with a fresh NiMH or lithium-ion cell rated for solar applications. This five-minute fix resolves most problems and costs under ten dollars.
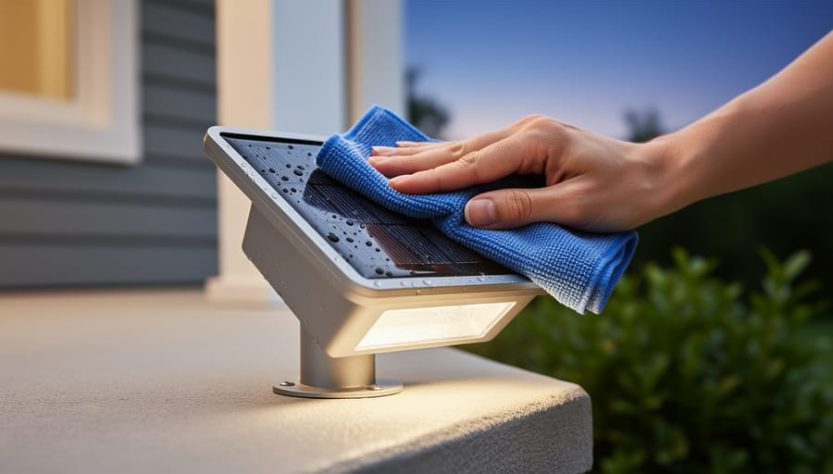
Before replacing the battery, however, perform a quick diagnostic check. Wipe the solar panel clean with a damp cloth, place the light in direct sunlight for a full day, then cover the panel completely after dark. If the LED glows, your battery simply needed a deeper charge cycle. If nothing happens, proceed to battery replacement or continue troubleshooting.
Solar lights fail for six primary reasons, each producing distinct symptoms. Dead or degraded batteries prevent energy storage. Dirty or shaded solar panels block charging. Corroded terminals interrupt the electrical circuit. Faulty photoresistors leave lights stuck on or off regardless of ambient light levels. Water ingress damages internal electronics. Burned-out LEDs eliminate output even when power flows correctly.
This guide walks you through systematic diagnosis matched to your specific symptoms, from flickering and dimming to complete failure. You’ll learn step-by-step repairs organized by difficulty, starting with simple cleaning and advancing through component replacement. Most fixes require only basic tools and take less than thirty minutes. We’ll also cover when professional service makes more sense than DIY repair, plus proven maintenance practices that extend solar light lifespan by years. The troubleshooting sequence follows electrical current from panel to battery to light, ensuring you identify root causes rather than masking symptoms.
Diagnosing Your Solar Light Problem: Initial Assessment
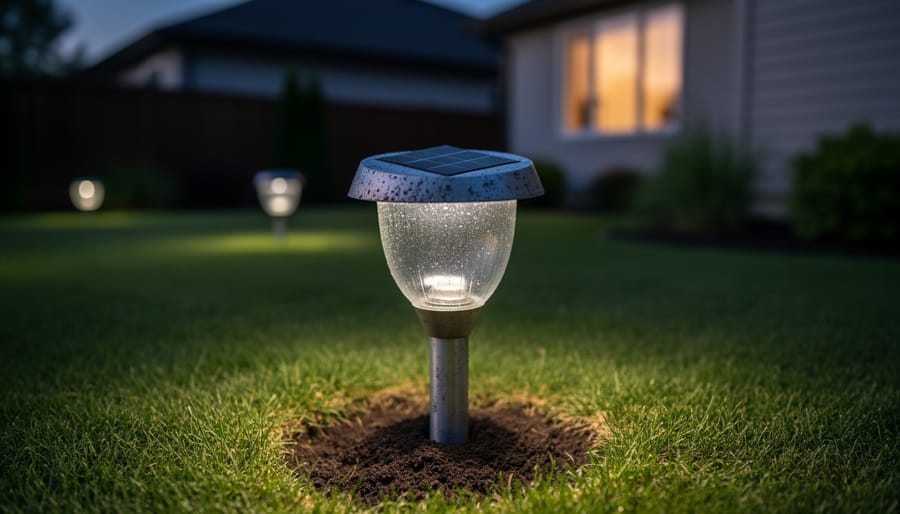
Before you can fix a solar light, you need to understand exactly what’s gone wrong. Solar lights fail in distinct patterns, and identifying your specific issue now will save you from wasting time on irrelevant repairs later.
Start by observing your solar lights over two complete day-night cycles. This baseline assessment reveals whether you’re dealing with a consistent problem or an intermittent one that depends on weather conditions or time of day.
Ask yourself these diagnostic questions:
- Is there any light output at all, or are the units completely dark?
- Do the lights turn on automatically at dusk as designed?
- How long do they stay illuminated after nightfall?
- Are all your solar lights affected, or just specific units?
The answers point you toward different root causes. Complete darkness suggests dead batteries, a disabled switch, or severe solar panel obstruction. Dim output typically indicates partially degraded batteries or dirty panels reducing charge capacity. Lights that flicker or turn on and off randomly often have faulty sensors or loose electrical connections. Units that illuminate briefly then fade within an hour haven’t stored enough energy during the day.
Check the installation environment next. Note whether your lights receive direct sunlight for at least six hours daily, or if tree growth, new construction, or seasonal sun angles have created shading that wasn’t present when you first installed them. Examine the solar panel surface for dirt, leaves, snow, or other debris blocking photovoltaic cells.
If only some lights in a group have failed while others in the same location work perfectly, you’re likely dealing with component failure in specific units rather than an environmental issue affecting all fixtures. Conversely, simultaneous failure across all lights suggests a shared problem like insufficient sun exposure or extreme weather damage.
Document what you observe. These details will guide you through the repair procedures ahead and help you determine whether you need replacement parts or simply better maintenance practices.
The Six Primary Causes of Solar Light Failure
Battery Degradation and Failure
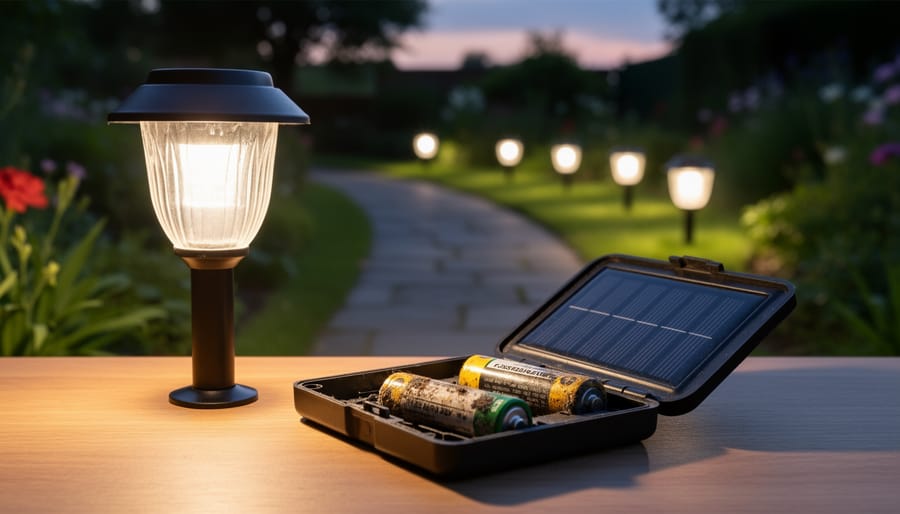
Battery degradation stands as the leading cause of solar light failure, accounting for roughly 60% of all cases. Rechargeable batteries in solar fixtures undergo hundreds of charge-discharge cycles annually, and this repeated chemical conversion gradually reduces their capacity to hold and deliver energy.
NiMH batteries typically last 2-3 years before performance drops noticeably. NiCd variants offer similar longevity but suffer from memory effect if partially discharged repeatedly. Lithium-ion cells, while more expensive, can reach 3-4 years in optimal conditions. Temperature extremes accelerate degradation significantly, both summer heat above 95°F and winter cold below 20°F stress the chemical processes inside the cells.
Warning signs appear before complete failure. Your lights may illuminate for only 2-3 hours instead of their usual 6-8, or they might glow dimly even after sunny days. Some units charge normally but discharge within an hour, indicating severe capacity loss.
Internal resistance increases as batteries age, making them less efficient at accepting charge from the solar panel and releasing stored energy to the LEDs. Once a battery reaches 70% of its original capacity, replacement becomes necessary to restore full functionality.
Dirty or Obstructed Solar Panels
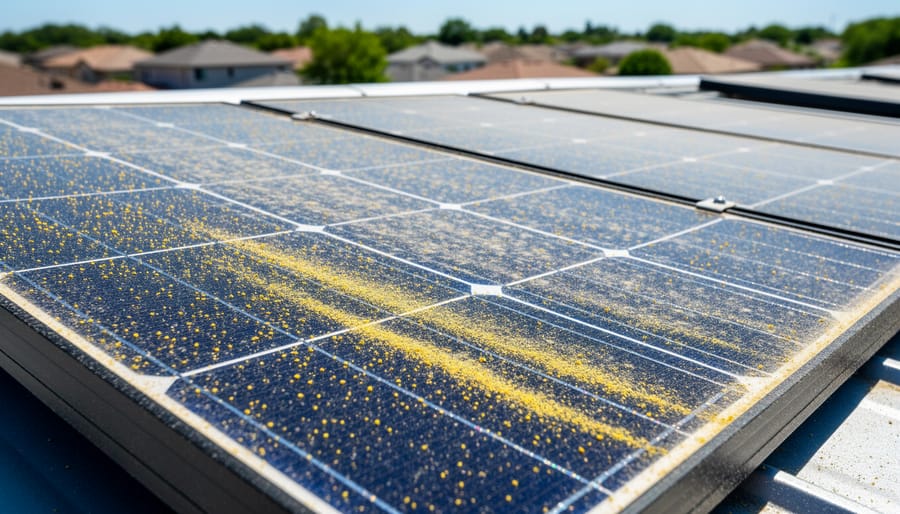
Solar panels rely on direct sunlight contact with photovoltaic cells to generate electricity. When dust, pollen, bird droppings, leaves, or snow accumulate on the panel surface, they create a barrier that reduces light transmission. Even a thin layer of dust can decrease charging efficiency by 20-30%, while heavier debris like bird droppings or wet leaves can block sections entirely.
The impact extends beyond simple coverage area. Photovoltaic cells are wired in series, meaning partial shading affects the entire panel’s output disproportionately. A small obstruction covering just 10% of the panel can reduce total power generation by 50% or more, as the shaded cells act as resistors limiting current flow through the entire circuit.
Environmental factors compound the problem. Coastal areas see salt spray buildup, industrial zones accumulate oily residue, and tree-heavy locations deal with sticky pollen and sap. In winter, even after snow melts, residual ice crystals or condensation can scatter incoming light. Wind-blown dirt adheres more readily to panels tilted at steep angles, while horizontal installations collect standing water that leaves mineral deposits when it evaporates.
Regular inspection reveals these issues before they significantly impact performance. Most obstructions are easily removed with gentle cleaning, making this one of the simplest solar light problems to address.
Insufficient Sunlight Exposure
Solar lights require direct sunlight to generate enough charge for overnight operation. Most units need 6-8 hours of unobstructed sun daily to reach full battery capacity. When fixtures receive less exposure, they’ll produce dim light or fail to illuminate entirely.
Placement mistakes account for many performance complaints. A location with adequate sun in spring may fall into shadow by summer as trees leaf out or by winter when the sun travels a lower arc across the sky. Neighboring buildings cast longer shadows during certain months, particularly at northern latitudes where seasonal sun angle variation reaches 47 degrees.
Examine your solar lights at different times throughout the day, not just when you installed them. Morning sun alone won’t suffice, panels need midday intensity when photovoltaic conversion peaks. Overhanging roof eaves, porch covers, and dense foliage create partial shading that dramatically reduces charging efficiency. Even 20% panel coverage can cut energy collection by 50% or more.
If relocation isn’t possible, consider whether the site fundamentally suits solar technology or requires grid-powered alternatives.
Water Ingress and Corrosion
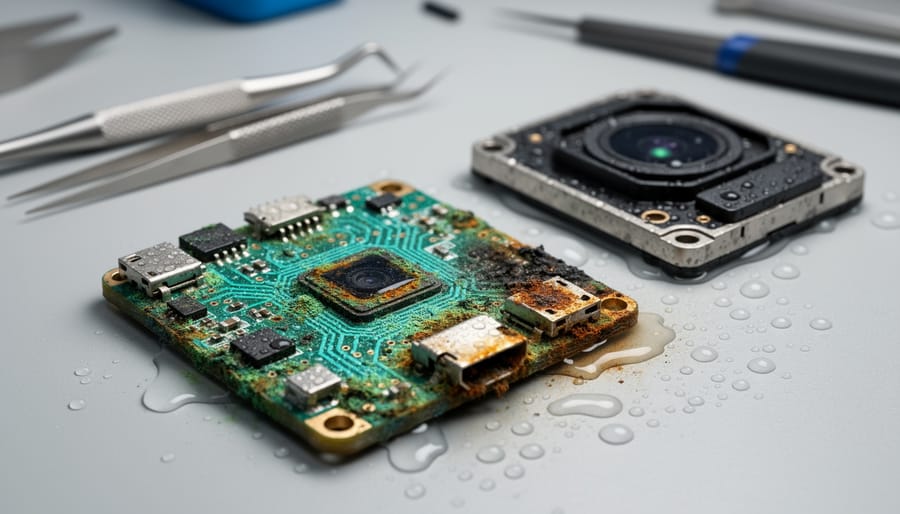
Water ingress ranks among the most destructive failure modes in solar lighting because moisture accelerates multiple degradation pathways simultaneously. When seals deteriorate or housings crack, often from UV exposure, thermal cycling, or physical impact, water penetrates the supposedly weatherproof enclosure and initiates corrosion on circuit boards, battery terminals, and solder joints.
The IP (Ingress Protection) rating stamped on quality solar lights indicates their moisture resistance. An IP65 rating provides dust-tight protection and guards against water jets, while IP44 offers only splash resistance. Budget fixtures frequently overstate their ratings or use inferior gaskets that compress and fail within a single season. Once compromised, even small amounts of condensation create conductive pathways on circuit boards, causing short circuits and component failure.
Corrosion manifests as greenish oxidation on copper traces, white powder on aluminum parts, or rust on steel fasteners. Battery contacts particularly suffer from oxidation, creating high-resistance connections that prevent charging. Photo sensors exposed to moisture often deliver erratic readings, causing lights to activate randomly or fail to turn on at dusk. Salt air in coastal environments and industrial pollutants dramatically accelerate this deterioration process.
Faulty Photo Sensors
Photo sensors serve as the automatic switch that triggers your solar lights at dusk and turns them off at dawn. When these components malfunction, lights may stay on during daylight (draining the battery prematurely), remain off at night, or cycle erratically between states.
The two common sensor types, photoresistors and photodiodes, react to ambient light levels by changing electrical resistance. Over time, sensor degradation occurs from UV exposure, temperature cycling, and moisture infiltration around the sensing element. A sensor coating that yellows or becomes opaque will misread light levels, causing the light to think it’s perpetually day or night.
Environmental interference also disrupts sensor accuracy. Nearby street lamps, porch lights, or motion-activated security lights can confuse the sensor into believing daylight persists, preventing activation. Similarly, physical obstructions like overgrown vegetation or accumulated dirt directly on the sensor window block proper light detection. If your solar light’s behavior changed after installing new outdoor lighting or seasonal plant growth, sensor confusion is the likely culprit rather than component failure.
LED Degradation and Circuit Board Issues
LEDs themselves rarely fail within a solar light’s expected service life, quality diodes should deliver 25,000 to 50,000 hours of operation, translating to 10-15 years of nightly use. The problem usually lies in thermal management and power regulation. Cheap solar lights often skip heat-sinking components, causing junction temperatures to spike during continuous discharge. This accelerates phosphor degradation and reduces light output even when the LED technically still functions.
Circuit board failures present more commonly. Solder joints weaken from thermal cycling, desert installations might swing 60°F between day and night, creating intermittent connections that cause flickering or complete dropout. Voltage regulation circuits can fail when inferior capacitors dry out, delivering unstable current that dims LEDs or prevents charging entirely. Manufacturing defects include cold solder joints, inadequate conformal coating against moisture, and undersized components that can’t handle the charge current. When testing reveals your battery and panel work correctly but the light still malfunctions, circuit failure is the likely culprit.
Damaged Wiring and Connection Points
Electrical connections are the nervous system of solar lights, and they’re particularly vulnerable to environmental stress. Loose solder joints on circuit boards crack under repeated temperature cycling, daily heating from solar panels and LEDs followed by nighttime cooling creates expansion and contraction that eventually fatigues these bonds. Physical damage from wind-blown fixtures or falling debris can sever thin internal wires that connect components. Battery terminals develop contact corrosion from moisture exposure or chemical reactions with battery electrolyte, creating resistance that prevents charging or discharge. Even vibrations from mounting on posts or stakes gradually work connections loose. These failures often manifest as intermittent operation, lights that work only when tapped or positioned certain ways. Inspect all visible connections for discoloration, green oxidation, or physical gaps. Resoldering joints requires specialized equipment and skills, making this a threshold where replacement often proves more practical than repair for budget fixtures.
Step-by-Step Repair and Restoration Procedures
Level 1: Basic Maintenance Fixes
Start with the solar panel surface, which accumulates grime faster than most people realize. Mix a few drops of dish soap with warm water, dampen a soft microfiber cloth, and gently wipe the panel in circular motions. Rinse with clean water and dry completely. Avoid abrasive scrubbers or harsh chemicals that can scratch the protective coating and reduce efficiency permanently.
Next, check the light’s positioning. Even minor vegetation growth can cast shadows that weren’t present at installation. Walk around the fixture at different times of day to identify obstructions. If trees or structures now block direct sunlight, relocate the unit to a spot receiving at least six hours of unfiltered sun. Most solar lights simply stake into soil or mount with basic brackets, making repositioning straightforward.
Locate the power switch, typically on the underside or back panel. Surprisingly often, switches get accidentally toggled during yard work or cleaning. Confirm it’s in the on position, then let the unit charge for 48 hours before testing at night.
Some models include a reset function, usually a small button near the battery compartment. Press and hold for 10-15 seconds to clear any sensor glitches. This simple reboot resolves intermittent operation more often than expected.
Level 2: Battery Replacement
Battery replacement often restores solar lights to full function when cleaning and repositioning fail to resolve the issue. Most solar lights use one of three rechargeable battery types: nickel-metal hydride (NiMH), nickel-cadmium (NiCd), or lithium-ion, each with specific voltage and capacity ratings that you must match exactly.
Before purchasing a replacement, open the battery compartment, typically accessed via a screw-on cap on the light’s underside or a panel beneath the solar array. Note the battery size designation (such as AA, AAA, or 18650), voltage (commonly 1.2V for NiMH and NiCd, 3.2V or 3.7V for lithium), and capacity measured in milliamp-hours (mAh). Many manufacturers print these specifications on the battery casing or inside the compartment cover.
Remove the old battery by disconnecting any spring contacts or wire terminals, noting the polarity orientation marked with plus and minus symbols. Clean the contact points with a dry cloth or fine sandpaper if you see corrosion, white or green deposits that interfere with electrical connection.
Install the new battery with correct polarity, ensuring firm contact between terminals and springs. Some models require a 24-hour charging period before first use, so position the light in direct sunlight and leave the switch in the off position during this initial charge cycle.
Dispose of old rechargeable batteries at designated recycling centers or retail drop-off locations, never in household waste. Nickel-cadmium batteries especially contain toxic heavy metals that require proper handling.
Level 3: Component Testing and Replacement
When basic maintenance and battery replacement don’t resolve the issue, systematic component testing identifies the specific failure point. You’ll need a digital multimeter, an inexpensive tool available for under $20 that measures voltage, current, and continuity.
Start by testing the solar panel output. Set your multimeter to DC voltage (20V range) and measure across the panel terminals in bright sunlight. A functioning panel should produce 3-6 volts depending on its size. Readings below 2 volts indicate a failed photovoltaic cell requiring panel replacement.
Next, check the battery voltage with the multimeter still on DC voltage setting. A fully charged NiMH or NiCd battery should read 1.2-1.4 volts per cell (2.4-2.8V for a two-cell pack). Consistently low readings after sunny days confirm battery failure even if the battery is relatively new.
Test LED functionality by switching your multimeter to continuity mode. Touch probes to LED terminals, a working LED may glow faintly and produce a reading between 1-4 volts. No reading suggests a burned-out LED.
Consider replacement economics carefully. If multiple components have failed or the circuit board shows corrosion, investing $15-40 in new solar lights often makes more sense than sourcing individual parts, particularly for budget fixtures where component costs approach replacement price.
When Professional Assessment Is Warranted
Beyond basic troubleshooting, certain solar light failures cross into professional territory. If multimeter testing reveals intermittent voltage fluctuations, circuit board damage beyond visible corrosion, or if multiple components fail simultaneously, the repair complexity often exceeds the unit’s replacement cost.
Consider professional assessment when:
– High-end landscape lighting systems (£200+) malfunction within their warranty period
– Integrated solar installations with hardwired connections to home electrical systems
– Commercial-grade fixtures with specialized components unavailable to consumers
– Damage involves sealed photovoltaic assemblies requiring soldering expertise
For budget fixtures under £30, replacement typically makes more economic sense than £50-80 repair quotes. However, premium solar lights with three-year warranties and modular designs often justify professional diagnosis, particularly when failure patterns suggest manufacturing defects eligible for claim support.
Preventing Future Solar Light Failures
Strategic Placement and Installation
Solar lights require at least six hours of direct sunlight daily for optimal performance. Map sun exposure across your installation area throughout the day, noting shadows cast by buildings, trees, and fences. Remember that deciduous trees create winter shadows from bare branches even after losing leaves, and sun angles shift dramatically between summer and winter, a spot with full exposure in June may receive partial shade in December.
Position lights away from high-traffic zones where lawn mowers, foot traffic, or vehicle movement might damage fixtures. Ground-mounted path lights should sit at least eight inches from paved edges. For areas with strong winds, choose fixtures with wider bases or stakes extending at least four inches into soil. In sandy or loose soil, pack earth firmly around stakes and consider adding gravel for stability.
Hard surfaces require different approaches. Use appropriate mounting hardware for concrete, brick, or wood, toggle bolts for masonry, stainless steel screws for weather-exposed wood. Ensure mounting surfaces drain water away from fixture bases to prevent pooling that accelerates corrosion. Solar panels should tilt toward the equator (south in Northern Hemisphere, north in Southern) when adjustable, maximizing year-round collection efficiency.
Seasonal Maintenance Protocols
Solar lights face distinct challenges across seasons, making climate-specific maintenance essential for continuous performance. In winter, frigid temperatures below -4°F (-20°C) can permanently damage batteries and reduce solar panel efficiency by up to 25%. If your region experiences sustained freezing, remove lights and store them indoors with batteries charged to 40-50% capacity. For lights left outside, clear snow accumulation within 24 hours, even two inches can block sunlight entirely.
Summer’s intense heat presents opposite problems. Temperatures exceeding 95°F (35°C) accelerate battery degradation and can warp plastic housings. Position lights to receive morning sun rather than afternoon heat when possible, and consider temporary shading during extreme heat waves above 105°F (40°C).
Spring demands thorough cleaning after winter. Remove all debris, check seals for winter damage, and inspect batteries for swelling or leakage. Autumn preparation involves final cleaning before leaf fall, trimming vegetation that’s grown over summer, and testing batteries before shorter days arrive.
Coastal environments require monthly corrosion checks and seal inspection. Desert regions benefit from more frequent panel cleaning due to dust accumulation. Humid climates need quarterly moisture checks inside fixtures to prevent corrosion before it starts.
Quality Selection and Specifications
Choosing quality solar lights from the start dramatically reduces failure rates and repair frequency. The IP (Ingress Protection) rating tells you exactly how well a fixture resists dust and water, look for IP65 minimum for outdoor applications, with IP67 recommended for wet climates or ground-level installations. The first digit indicates dust protection (6 means dust-tight), while the second shows water resistance (5 withstands jets, 7 handles brief immersion).
Battery chemistry matters more than most buyers realize. Name-brand NiMH batteries from recognized manufacturers typically deliver 800-1000 charge cycles versus 300-500 for generic alternatives. Check stated capacity in milliamp-hours (mAh), garden path lights need 600-800mAh minimum, while security lighting requires 2000mAh or higher. Solar panel efficiency varies from 15% in budget models to 22% in premium units, directly affecting charging speed and low-light performance.
Build quality indicators include thick polycarbonate lenses (not thin acrylic), stainless steel or powder-coated aluminum bodies, and visible gasket seals at access points. A unit costing three times more but lasting five times longer represents better value than repeated cheap replacements, especially when you factor in installation time and disposal impact.
Understanding Solar Light Technology Fundamentals
Understanding how solar lights function illuminates why they fail and what you can repair versus what requires replacement. At their core, solar lights are integrated systems where each component depends on the others working correctly.
The charging cycle begins when photovoltaic cells embedded in the solar panel absorb sunlight and generate direct current electricity through the photoelectric effect. During daylight hours, this generated power flows through a charge controller, a small circuit that regulates voltage and prevents battery overcharging, into the rechargeable battery. The charge controller protects battery longevity by cutting off charging when the battery reaches full capacity and preventing deep discharge that damages cells.
- Photovoltaic Cells
- Semiconductor components (typically crystalline or amorphous silicon) that convert light photons directly into electrical current through the photoelectric effect. Their efficiency determines how quickly your solar light charges.
- NiMH vs Lithium Batteries
- Nickel-metal hydride (NiMH) batteries are common in budget solar lights but degrade faster in temperature extremes, while lithium-ion batteries cost more but offer longer lifespans, better cold-weather performance, and higher energy density.
- Lumens
- The measurement unit for total light output; solar path lights typically produce 10-50 lumens, while security floodlights can exceed 1000 lumens, directly affecting battery drain rate and required solar panel size.
- IP Ratings
- Ingress Protection codes (like IP65 or IP67) indicating dust-tightness and water resistance; the first digit rates solid particle protection (0-6), the second rates liquid protection (0-9).
- Photoresistor
- A light-sensing component whose electrical resistance changes with ambient light levels, triggering the circuit to switch the LED on at dusk and off at dawn automatically.
- Charge Controller
- The regulatory circuit between solar panel and battery that prevents overcharging damage and manages power distribution to ensure safe, efficient charging cycles.
As darkness falls, the photoresistor detects diminishing light and signals the control circuit to disconnect the solar panel and connect the battery to the LED. This automated switching eliminates manual operation but creates a failure point if the sensor malfunctions or becomes obscured.
Recent solar innovations have improved panel efficiency and battery chemistry, but the fundamental architecture remains consistent across price points. Understanding this energy flow helps you pinpoint where your specific solar light has broken down, whether the panel cannot charge, the battery cannot store, or the control circuit cannot switch properly.
Frequently Asked Questions About Solar Light Failures
How often should I replace solar light batteries?
Most rechargeable batteries in solar lights need replacement every 1-3 years depending on usage intensity and climate conditions. NiCd batteries typically last toward the lower end of this range, while quality NiMH batteries often reach 2-3 years before noticeable performance decline.
Will solar lights work during winter or in cold climates?
Solar lights function in winter but with reduced performance due to shorter days, lower sun angles, and snow coverage on panels. Battery efficiency drops significantly below freezing, often losing 20-40% capacity at temperatures near 0°F, which shortens nightly runtime even when panels receive adequate charging.
How frequently should I clean the solar panels?
Clean panels monthly in dusty or high-pollen environments, and at minimum every 2-3 months in cleaner locations. After storms, snow, or extended periods without rain, immediate cleaning restores charging capacity that can drop 50% or more with heavy debris accumulation.
When does repairing solar lights make financial sense versus buying new ones?
Repair makes sense when the issue is a simple battery replacement costing $5-15 on lights originally priced above $30-40. If multiple components have failed, the housing is cracked, or the unit cost under $20 new, replacement typically offers better value and updated efficiency.
What warranties typically cover solar light failures?
Most manufacturers provide 90-day to 1-year warranties covering defects but excluding batteries, which are considered consumables. Premium brands sometimes offer 2-year coverage, though weather damage, improper installation, and normal wear remain excluded in nearly all warranty terms.
How can I test if my solar panel is still generating power?
Use a multimeter set to DC voltage and measure across the panel’s output wires in direct sunlight. A functioning panel should produce voltage close to its rating (typically 2-6V depending on model). No reading or significantly reduced voltage indicates panel failure or severe contamination blocking photovoltaic cells.
Can I recycle failed solar lights or their components?
Yes, but components require separation. Batteries must go to dedicated battery recycling facilities or hazardous waste collection sites. Solar panels and circuit boards qualify as e-waste requiring specialized recycling, while plastic housings follow standard recycling streams if your municipality accepts the specific resin type.
How many hours should solar lights run each night when fully charged?
Quality solar lights run 8-12 hours on a full charge in summer conditions, though this drops to 4-6 hours in winter due to reduced charging time and colder battery performance. If your lights shut off after 2-3 hours despite full sun exposure, battery degradation or insufficient panel output is likely.
These practical answers address the troubleshooting questions that arise most frequently when solar lights underperform or fail completely. The technology behind these fixtures mirrors principles found in larger off-grid solar power systems, just scaled down to landscape and security lighting applications. Understanding battery lifecycles and replacement intervals connects directly to broader energy storage challenges facing renewable storage systems at every scale. The same chemical degradation affecting a small NiMH cell in a garden path light also impacts grid-scale battery installations, making proper maintenance and timely replacement essential for reliable performance regardless of system size.
Maintaining solar lights rather than defaulting to replacement serves multiple environmental and economic benefits that align with broader renewable trends. Each repaired unit represents avoided manufacturing emissions, reduced electronic waste, and continued carbon-free illumination. The diagnostic pathway outlined here moves systematically from symptom identification through root cause analysis to targeted repairs, empowering both professionals and engaged consumers to extend the functional life of these renewable energy devices.
Solar lighting technology has matured into a reliable, accessible entry point for renewable energy adoption. Whether illuminating pathways, enhancing security, or adding landscape ambiance, these devices demonstrate that sustainable technology delivers practical value when properly understood and maintained. The troubleshooting skills developed through solar light repair translate to broader renewable energy literacy, helping users recognize that most system failures have identifiable causes and achievable solutions.
By viewing occasional maintenance as an investment rather than a burden, you extend device lifespan from the typical 2-3 years to 5-7 years or more. This maintenance-first mindset reinforces the core sustainability principle that the greenest product is the one you already own, functioning reliably through informed care.