

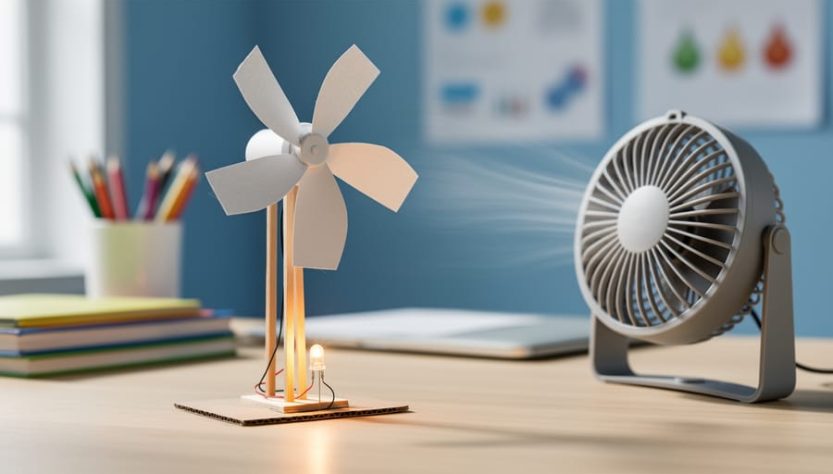
Building a functional windmill model takes about 90 minutes and requires only household materials like paper cups, wooden skewers, and a small motor or LED to demonstrate energy conversion. This hands-on STEM project transforms abstract wind power basics into a tangible learning experience that shows students exactly how kinetic energy from moving air becomes usable electricity.
The project serves multiple educational goals simultaneously. Students engage with engineering design principles as they construct rotor blades and optimize tower stability. They apply physics concepts when testing how blade angle and wind speed affect power output. Most importantly, they see renewable energy technology working in real time rather than reading about it in a textbook.
Educators have used windmill projects in classrooms from elementary through high school, scaling complexity to match student readiness. A fifth-grader might focus on building a structure that spins reliably, while a high school physics student calculates torque and measures voltage output under varying conditions. Parents find the project equally valuable for home learning, especially since the core materials cost less than fifteen dollars.
What makes this project particularly effective is its immediate visual feedback. When students adjust their blade design and watch the rotor spin faster or an LED glow brighter, they grasp cause and effect in renewable energy systems. That concrete understanding builds the foundation for more sophisticated explorations of grid-scale wind power and energy storage challenges facing our transition to sustainable infrastructure.
Tools and Materials You’ll Need
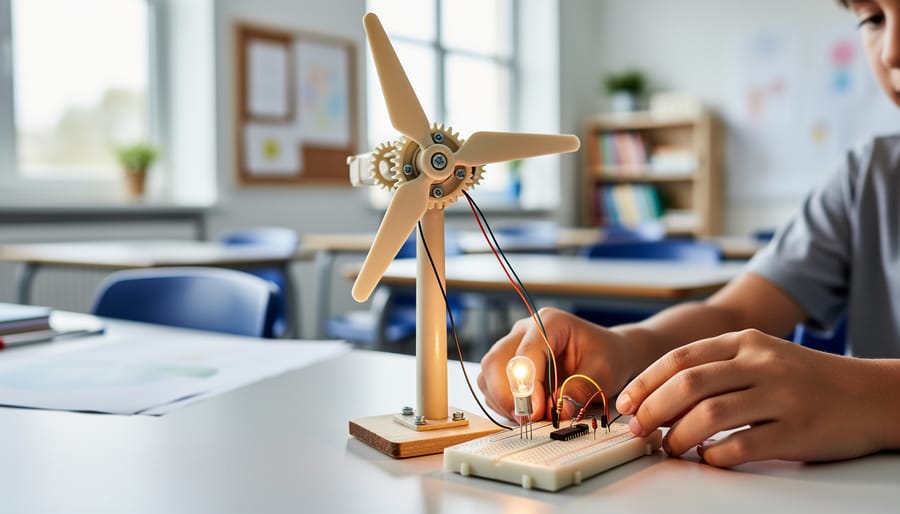
Gathering the right materials before you start makes the building process smooth and enjoyable. Most items for a basic stem windmill project are readily available at home or can be purchased inexpensively at craft stores, hardware shops, or online retailers.
Essential Materials by Category
- Structural components: cardboard (at least 12″ x 12″), wooden dowels or sturdy straws (8-12 inches long), plastic bottle or paper cup for the base, scissors or craft knife, tape (masking or duct), glue (hot glue gun or craft glue), ruler or measuring tape
- Electrical components: small DC motor (1.5-6V hobby motor), LED light (any color, 1.5-3V rating works well), alligator clip test leads or thin wire for connections
- Tools: hole punch or push pin, pencil for marking, safety scissors (for younger students), sandpaper (optional, for smoothing edges)
- Optional enhancement items: multimeter for measuring voltage output, small capacitor for energy storage experiments, additional LEDs for parallel circuits, decorative materials like paint or markers
For the blades, lightweight materials work best. Cardstock, manila folders, or thin plastic sheets from food containers all capture wind effectively. Cut four to six blades, each roughly 3-4 inches long and 1-2 inches wide at the base.
The DC motor serves as your generator, when the blades spin the motor’s shaft, it produces electricity. Salvage motors from old toys or purchase hobby motors for under five dollars. Match your LED voltage rating to your motor’s output range, typically 1.5-3 volts for small projects.
Budget-conscious builders can substitute a hand-crank generator or even skip the electrical component entirely to focus on mechanical rotation. Students in well-equipped makerspaces might incorporate 3D-printed components, while home learners achieve identical learning outcomes using recycled materials. The key is creating blades that rotate freely and connect reliably to your chosen generator, regardless of material sophistication.
Safety Precautions and Workspace Setup
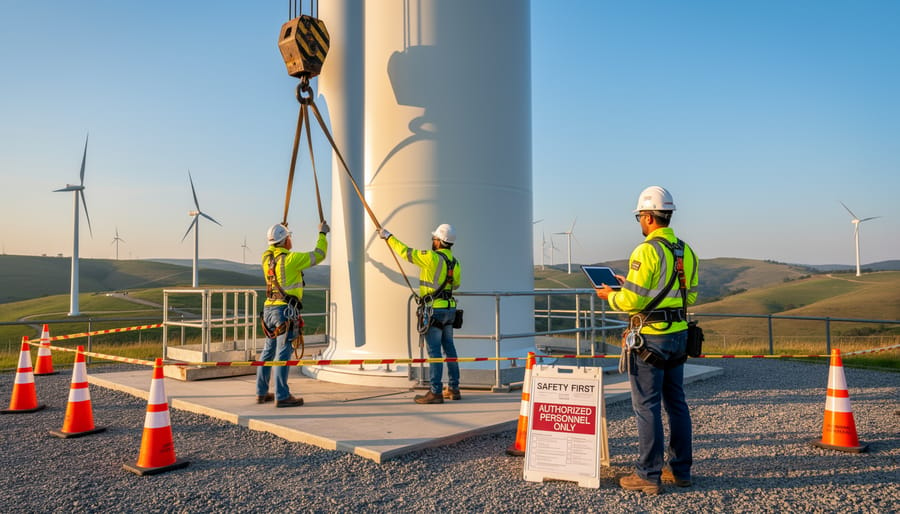
Before starting your windmill project, establish a clear workspace and review essential safety protocols. This preparation ensures both learning success and physical safety throughout the construction process.
Choose a well-lit, flat work surface with adequate room to spread out materials and tools. A sturdy table or desk works best, preferably in a space where small parts won’t easily roll away or get lost. Keep the area clear of clutter, food, and drinks that could damage electrical components or create tripping hazards.
Gather your protective equipment before handling any materials. Safety glasses protect eyes from flying debris when cutting cardboard or wood. If your design includes soldering electrical connections, ensure adequate ventilation and keep a first aid kit nearby for minor burns. Work gloves can prevent cuts when handling sharp edges, though they should be removed when working with electrical components to maintain dexterity.
Organize tools and materials into designated zones on your workspace. Keep cutting implements like scissors, utility knives, or saws in one area, electrical components in another, and adhesives separate from both. This organization prevents accidents and makes the construction process more efficient.
Establish ground rules for handling the completed windmill. Once assembled, the rotating blades can pinch fingers or catch hair and loose clothing. Test the device only in controlled conditions, never near faces, and secure long hair before operating the windmill. These precautions transform your workspace into an effective learning environment where safety supports exploration.
Building Your Windmill: Step-by-Step Instructions
Constructing the Base and Tower
Choose a base material that provides enough weight and surface area to keep your windmill upright during testing. A piece of thick cardboard (at least 8×8 inches) works well for lightweight designs. For a sturdier option, use a wooden board, a plastic container lid, or even a foam project board. The base should be heavy enough that wind force won’t tip the structure over.
For the tower, a wooden dowel (12-18 inches long, ¼ to ½ inch diameter) offers excellent rigidity and easy mounting. If you don’t have dowels, try a pencil, a rigid straw bundle (tape 3-4 straws together), or a plastic bottle with the top cut off. The tower height matters: taller structures catch more wind but need better stabilization.
Secure the tower to your base using strong tape, hot glue, or by punching a hole through the base material and inserting the dowel through it. If using cardboard, reinforce the connection point with extra layers or a cross-brace made from popsicle sticks. For plastic bottle towers, fill the bottom third with sand or small stones for ballast before attaching it to the base.
Test stability by gently pushing the tower from different angles. It should return to vertical without the base lifting. If it wobbles, widen your base or add weight to the corners. This foundation supports all the moving parts above, so spend time getting it right before moving forward.
Designing and Attaching the Blades
Your windmill’s blades convert moving air into rotational force, so their design directly determines how much energy you capture. Start with three or four blades cut from lightweight, rigid materials like cardboard, plastic cups, or foam core. While adding more blades might seem like it would capture more wind, blade number increases efficiency only up to a point, beyond four or five blades, you create more drag than benefit, slowing rotation. Three blades offer an excellent balance of performance and simplicity for most STEM projects.
Shape each blade with a slight curve or angle, similar to an airplane wing. This curve creates lift as wind passes over it, pulling the blade forward rather than just pushing it. For cardboard blades, cut rectangles roughly 4-6 inches long and 2-3 inches wide, then twist each one about 15-20 degrees along its length. Secure them evenly spaced around your hub (a bottle cap, cork, or cardboard circle) using hot glue, tape, or small bolts.
Test different angles by adjusting how much you twist each blade. Steeper angles catch more wind but create more resistance, while flatter blades spin faster in light breezes but may struggle in still air. Mark each configuration and record how fast it spins to find your optimal design.
Ensure all blades are identical in size and weight. Unbalanced blades wobble and waste energy through vibration rather than smooth rotation. Attach them at equal intervals, for three blades, that’s 120 degrees apart; for four, 90 degrees. A symmetrical design spins smoothly and transfers maximum mechanical energy to your generator.
Installing the Generator Component
The generator component transforms your windmill’s spinning motion into usable electricity. This crucial step brings the energy conversion principle to life, demonstrating how a small DC motor converts mechanical to electricity when operated in reverse.
Start by securing your DC motor to the tower structure. Position it directly behind where your blade assembly will mount, ensuring the motor shaft extends through the tower centerpoint. Use hot glue, tape, or zip ties depending on your construction materials. The motor must remain stationary while allowing the shaft to rotate freely. Test this by gently spinning the shaft before proceeding.
Connect the motor shaft to your blade hub using either a friction-fit method or a small coupling. For cardboard hubs, create a center hole slightly smaller than the shaft diameter and press it firmly onto the motor. If using plastic caps, apply hot glue to bond the cap directly to the shaft end. The connection must be tight enough to prevent slipping during rotation but aligned straight to avoid wobbling.
Wire the motor terminals to your output device. Strip about half an inch of insulation from two pieces of insulated wire, then twist one wire around each motor terminal. Secure these connections with electrical tape or small wire nuts. For powering an LED, connect the positive motor terminal (usually marked red) to the LED’s longer leg and the negative terminal to the shorter leg. Following proper LED wiring tips prevents damage and ensures your windmill produces visible results when tested.
Verify all connections are insulated from each other to prevent short circuits. Leave enough wire length to allow blade rotation without pulling tension on the motor terminals.
Testing and Verifying Your Windmill Works
Once you’ve completed construction, it’s time to verify your windmill converts wind into electrical energy. Start with a simple breath test: blow steadily on the blades from about six inches away and watch for rotation. If the blades spin smoothly, move to a battery-powered desk fan set on low speed, positioned roughly twelve inches from your windmill. This controlled airflow provides consistent testing conditions and lets you observe how blade speed correlates with energy generation.
For windmills equipped with an LED, successful energy conversion shows as visible light when the blades reach sufficient rotation speed. The LED should illuminate steadily at moderate fan speeds, though it may flicker initially as the blades accelerate. If you’ve connected a multimeter instead, set it to measure DC voltage and watch for readings between 0.5 and 3 volts, depending on your motor type and wind speed. Higher blade rotation produces higher voltage, demonstrating the direct relationship between mechanical motion and electrical output.
Natural outdoor testing provides real-world validation but requires patience. Choose a day with steady breezes rather than gusty conditions, and position your windmill where airflow isn’t blocked by buildings or trees. Count blade rotations per minute to quantify performance: thirty to sixty rotations typically indicates adequate wind for energy generation.
When troubleshooting weak output, first check that all electrical connections remain secure and that the motor shaft aligns properly with the blade hub. Blades that barely rotate often suffer from excessive friction at the axle point; a tiny drop of oil can resolve this. If blades spin freely but produce no electricity, verify the motor wires connect to the correct LED terminals, maintaining proper polarity. Unbalanced blades cause wobbling that wastes energy, so ensure each blade weighs approximately the same and sits at identical angles. For students interested in maximizing output, experimenting with energy storage ideas like small capacitors can demonstrate how intermittent wind power gets captured for later use, mirroring commercial wind farm challenges.
Next Steps: Experimenting and Improving Your Design
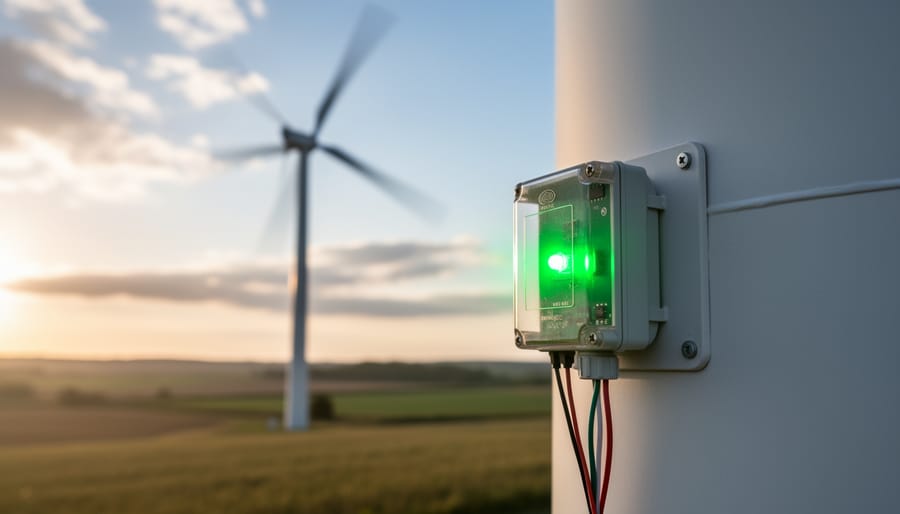
Once your windmill generates power consistently, treat it as a testbed for real engineering questions. Start by varying blade count: build three-blade, four-blade, and six-blade sets from identical materials, then measure which configuration spins fastest under the same wind source. Record rotation speed and voltage output for each. This mirrors how commercial turbine designers optimize performance.
Next, experiment with blade materials. Cut identical shapes from cardboard, plastic sheet, balsa wood, and aluminum foil. Test each under controlled conditions, same distance from a fan, same wind speed setting, and document which material produces the highest readings. You’ll discover trade-offs between weight, rigidity, and aerodynamics that engineers face when selecting composites for full-scale turbines.
Try modifying blade pitch (the angle at which blades meet the wind). Flatten your blades completely, then gradually increase the twist. Measure how pitch changes affect startup speed and maximum rotation. This experiment demonstrates principles behind variable-pitch systems in modern wind farms.
Add energy storage by connecting a rechargeable battery or capacitor to your generator output. Calculate how long your windmill takes to charge the component, then measure how long it powers your LED afterward. This introduces load management concepts central to grid-scale renewable energy breakthroughs.
For advanced learners, investigate tower height effects by testing your windmill at ground level versus elevated positions. Document voltage differences, connecting your findings to why utility-scale turbines stand 80+ meters tall.
Each modification teaches how engineers balance efficiency, cost, and reliability in emerging renewable tech. Keep a lab notebook recording all variables, measurements, and observations. This data-driven approach transforms your project from a one-time build into ongoing scientific inquiry.
Understanding the Science Behind Your Windmill
Your windmill demonstrates three fundamental energy transformations that power both your tabletop model and the massive turbines generating electricity across wind farms worldwide.
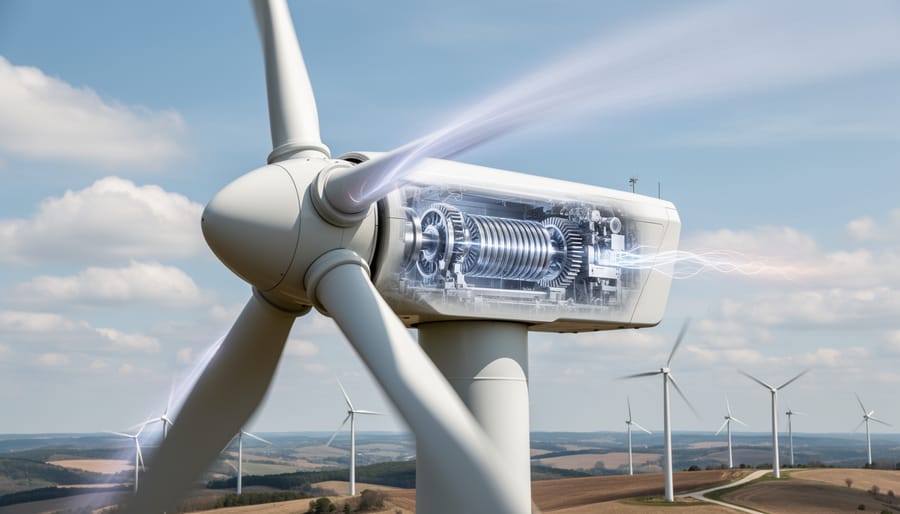
First, moving air carries kinetic energy, energy of motion. When wind strikes your windmill’s blades, it transfers this energy through mechanical force. The curved blade surface creates pressure differences, similar to an airplane wing, causing rotation. This conversion from wind’s kinetic energy to mechanical rotation is the foundation of all wind power systems.
Second, your windmill transforms mechanical energy into electrical energy. As the blades spin the shaft, they turn the motor (which now functions as a generator). Inside, magnets rotate past wire coils, creating electromagnetic induction, the same principle Michael Faraday discovered in 1831. This generates the electrical current that lights your LED.
The efficiency of this process depends on several factors you’ve likely observed while testing. Blade shape and number affect how much wind energy gets captured. Three blades typically balance efficiency and stability in large turbines, though your model might use more or fewer. Blade angle (pitch) determines how aggressively blades catch the wind. Tower height matters because wind speed increases with altitude, even the few inches between your desk and a higher mount make a measurable difference.
Commercial turbines apply these same principles at vastly different scales. Where your model might generate milliwatts, a single utility-scale turbine produces several megawatts, enough to power hundreds of homes. Both rely on optimizing these energy conversions to extract maximum power from available wind resources.
Frequently Asked Questions
Building a STEM windmill project raises practical questions about design choices and educational implementation. Here are answers to the most common concerns educators and students encounter.
How many blades should my windmill have?
Three blades typically provide the best balance of efficiency and stability for educational models. While two-blade designs spin faster, they’re harder to balance, and four or more blades create drag that reduces rotation speed without significantly increasing power output.
What’s the best generator for a classroom windmill project?
Small DC hobby motors (1.5-6V) work excellently as generators and cost just a few dollars. They’re safe for students to handle, produce enough voltage to light an LED, and can be salvaged from old toys, making them both affordable and accessible.
Why isn’t my windmill generating enough power to light the LED?
Check that your blades are angled correctly (10-15 degrees from vertical), connections are secure with no loose wires, and you’re using a low-voltage LED that matches your motor’s output. Increasing blade surface area or wind speed can also boost power production.
What age groups can successfully complete this project?
With proper supervision, students as young as third grade can build basic windmills, while middle and high school students can tackle more complex versions with electrical measurements and design optimization experiments. Adjust the complexity of electrical connections and data collection to match student capabilities.
Material substitutions offer flexibility when specific components aren’t available. Cardboard works just as well as foam board for blades, plastic bottles can replace wooden dowels for the tower, and even a hand-crank flashlight can serve as a generator if small motors aren’t accessible. The core learning happens regardless of premium materials.
Scaling up the project transforms it into advanced engineering. Students can build larger versions using PVC pipe towers and bigger motors, add capacitors to store energy, or create arrays of multiple windmills to power small devices like calculators or phones. These extensions naturally lead into discussions about grid-scale wind farms and energy storage challenges facing renewable power today.
How to Check Your Work
A successful stem windmill project demonstrates three clear outcomes: consistent blade rotation, measurable electrical output, and stable structural integrity. When you blow on the blades or place the windmill in front of a fan, they should spin freely without wobbling or scraping against the tower. This smooth rotation indicates proper balance and alignment.
To verify electrical generation, connect your LED or multimeter. A working generator component should illuminate the LED (even dimly) or produce a voltage reading between 0.5 and 3 volts when blades turn at moderate speed. If there’s no output, check that wires are securely connected and the motor shaft couples tightly to the blade assembly.
Inspect the base for stability. The structure shouldn’t tip over during operation or when gently nudged. All glued or taped joints should hold firm without separating.
Since this is an educational model rather than a professional installation, you won’t need to call an expert. However, if you’re planning to scale up to a permanent outdoor installation or integrate battery storage systems, consult an electrician for safe wiring practices. For classroom settings with multiple students, a teacher or experienced maker should verify each project meets safety standards before testing.
Building a STEM windmill project transforms abstract renewable energy concepts into tangible, hands-on learning experiences. Through constructing your own wind-powered generator, you’ve explored the fundamental principles that drive commercial wind turbines worldwide, from energy conversion to blade aerodynamics. This hands-on approach creates lasting understanding that textbook explanations alone cannot achieve.
The skills you’ve developed, problem-solving, iterative design, scientific observation, extend far beyond this single project. Consider expanding your renewable energy exploration with solar-powered vehicles, hydroelectric generators, or biomass experiments. Each project deepens your grasp of sustainable energy solutions and the engineering challenges facing our transition to cleaner power sources.
Your windmill represents more than a classroom activity. It’s a working model of technology that currently generates over 10% of global electricity and continues expanding rapidly. By understanding these principles now, you’re building the foundation for careers in environmental science, engineering, or sustainable development. Keep experimenting, keep improving your designs, and continue exploring the renewable energy innovations shaping our future.